Introduction
Forms are fundamental elements of any website, serving as crucial touchpoints for interaction between visitors and site owners. They facilitate communication, gather user data, and enable businesses to capture leads effectively. In the realm of content management systems (CMS), Drupal 10 stands out for its robust capabilities in form creation and management.
Importance of Forms in Websites
Forms play a pivotal role in converting visitors into leads, subscribers, or customers. They enable seamless data collection, such as user inquiries, newsletter sign-ups, event registrations, and more. Effective form design not only enhances user experience but also contributes significantly to the overall success of digital marketing strategies.
Drupal 10: Empowering Form Creation
As one of the leading open-source CMS platforms, Drupal 10 empowers website owners with powerful tools for building and managing forms. Its flexible architecture, coupled with an extensive array of modules and themes, makes it a preferred choice for developers and marketers alike. Whether you're creating simple contact forms or complex surveys, Drupal 10 offers the scalability and customization options needed to tailor forms to specific business needs.
In this guide, we'll explore how to harness the capabilities of Drupal 10 for form creation and seamlessly integrate these forms with HubSpot, a leading CRM platform. By the end of this step-by-step guide, you'll be equipped to leverage Drupal 10's strengths alongside HubSpot's robust features to enhance your website's lead generation and customer relationship management efforts.
Understanding HubSpot Integration
What is HubSpot and why integrate it with Drupal?
HubSpot is a leading customer relationship management (CRM) platform that provides tools for marketing, sales, and customer service. It helps businesses manage their interactions with customers and automate various tasks to streamline workflows.
Integrating HubSpot with Drupal allows website owners to leverage HubSpot's powerful CRM capabilities directly within their Drupal-powered websites. This integration enhances marketing efforts by syncing customer data, automating lead nurturing, and improving overall engagement with site visitors.
Benefits of using HubSpot for form management and CRM
HubSpot offers several benefits for form management and CRM:
- Centralized Data Management: All form submissions and customer interactions are stored centrally in HubSpot, providing a unified view of leads and customers.
- Automation: Automate lead nurturing workflows based on form submissions, ensuring timely follow-ups and personalized communications.
- Analytics and Reporting: Gain insights into form performance, conversion rates, and customer behavior through HubSpot's analytics tools.
- Personalization: Use data collected through forms to personalize marketing campaigns and improve customer engagement.
- Integration Capabilities: Easily integrate with other tools and platforms, enhancing the overall functionality and efficiency of your marketing and sales operations.
Step 1: Setting Up Your Drupal 10 Environment
Before we start, ensure you have a working Drupal 10 installation. You can download and install Drupal 10 from the official Drupal website.
To install Drupal 10, follow these steps:
- Download the latest version of Drupal from the official Drupal website.
- Extract the downloaded archive and move it to your web server's root directory.
- Create a new database for your Drupal site using your preferred database management tool (e.g., phpMyAdmin).
- Open your web browser and navigate to your Drupal site's URL to start the installation process.
- Follow the on-screen instructions to complete the installation, providing the database details and configuring your site settings as needed.
Configuring Basic Settings and Modules for Form Creation
Once you have installed Drupal 10, you can configure basic settings and install modules to enable form creation:
-
Basic Site Configuration:
- Log in to your Drupal site's admin panel.
-
Go to
Configuration > System > Basic site
                        settings
. - Set your site name, email address, and other basic settings.
-
Installing Modules:
- Go to
Extendin the admin menu. -
Search for the
Webformmodule and check the box next to it. - Click
Installto enable the module.
- Go to
-
Creating a Form:
-
After installing the Webform module, go to
Structure > Webforms. -
Click
Add webformto create a new form. - Configure the form fields and settings as needed.
-
After installing the Webform module, go to
Step 2: Installing Required Modules
To integrate HubSpot with Drupal, we need to install the following modules:
- Webform
- Webform HubSpot
To integrate HubSpot with Drupal, we need to install the following modules:
- Webform: This module allows you to create forms within Drupal, which can be integrated with HubSpot.
- Webform HubSpot: This module enables integration between Drupal Webforms and HubSpot, allowing form submissions to sync with HubSpot.
Install the Webform Module
To install the Webform module, follow these steps:
composer require 'drupal/webform:^6.2'
- Log in to your Drupal admin interface.
- Navigate to Extend > Install new module.
- Enter
webformin the module search field. - Click Install next to the Webform module.
- Once installed, enable the Webform module by checking the box next to it and clicking Install.
Install the Webform HubSpot Module
Follow these steps to install the HubSpot module:
composer require 'drupal/hubspot:^3.0@alpha'
- Log in to your Drupal admin interface.
- Navigate to Extend > Install new module.
-
Enter
webform_hubspotin the module search field. - Click Install next to the Webform HubSpot module.
- Once installed, enable the Webform HubSpot module by checking the box next to it and clicking Install.
Step 3: HubSpot Account Creation
We need both a developer and a regular HubSpot account to integrate with the Drupal form.
How to Create a HubSpot Developer Account
-
Visit the HubSpot Developer Signup Page: Go
to the
HubSpot Developer Signuppage by visiting https://developers.hubspot.com. -
Click on "Get started for free": Locate and
click the
Get started for freebutton. -
Sign up with your email: Enter your email
address in the provided field and click
Next. -
Fill in your details: Provide your first
name, last name, and any other required information, then
click
Next. -
Create a password: Enter a secure password,
confirm it, and then click
Next. - Complete the signup process: Follow the on-screen instructions to complete the signup process, including email verification if required.
- Access your developer account: Once you have completed the signup process, you will be redirected to your HubSpot Developer account dashboard where you can start building and managing your applications.
How to Create a HubSpot Account
-
Visit the HubSpot Signup Page: Go to the
HubSpot Signuppage by visiting https://www.hubspot.com. -
Click on "Get started free": Locate and click
the
Get started freebutton. -
Sign up with your email: Enter your email
address in the provided field and click
Get started. -
Fill in your details: Provide your first
name, last name, and any other required information, then
click
Next. -
Create a password: Enter a secure password,
confirm it, and then click
Next. - Complete the signup process: Follow the on-screen instructions to complete the signup process, including email verification if required.
- Access your HubSpot account: Once you have completed the signup process, you will be redirected to your HubSpot dashboard where you can start using HubSpot's tools and features.
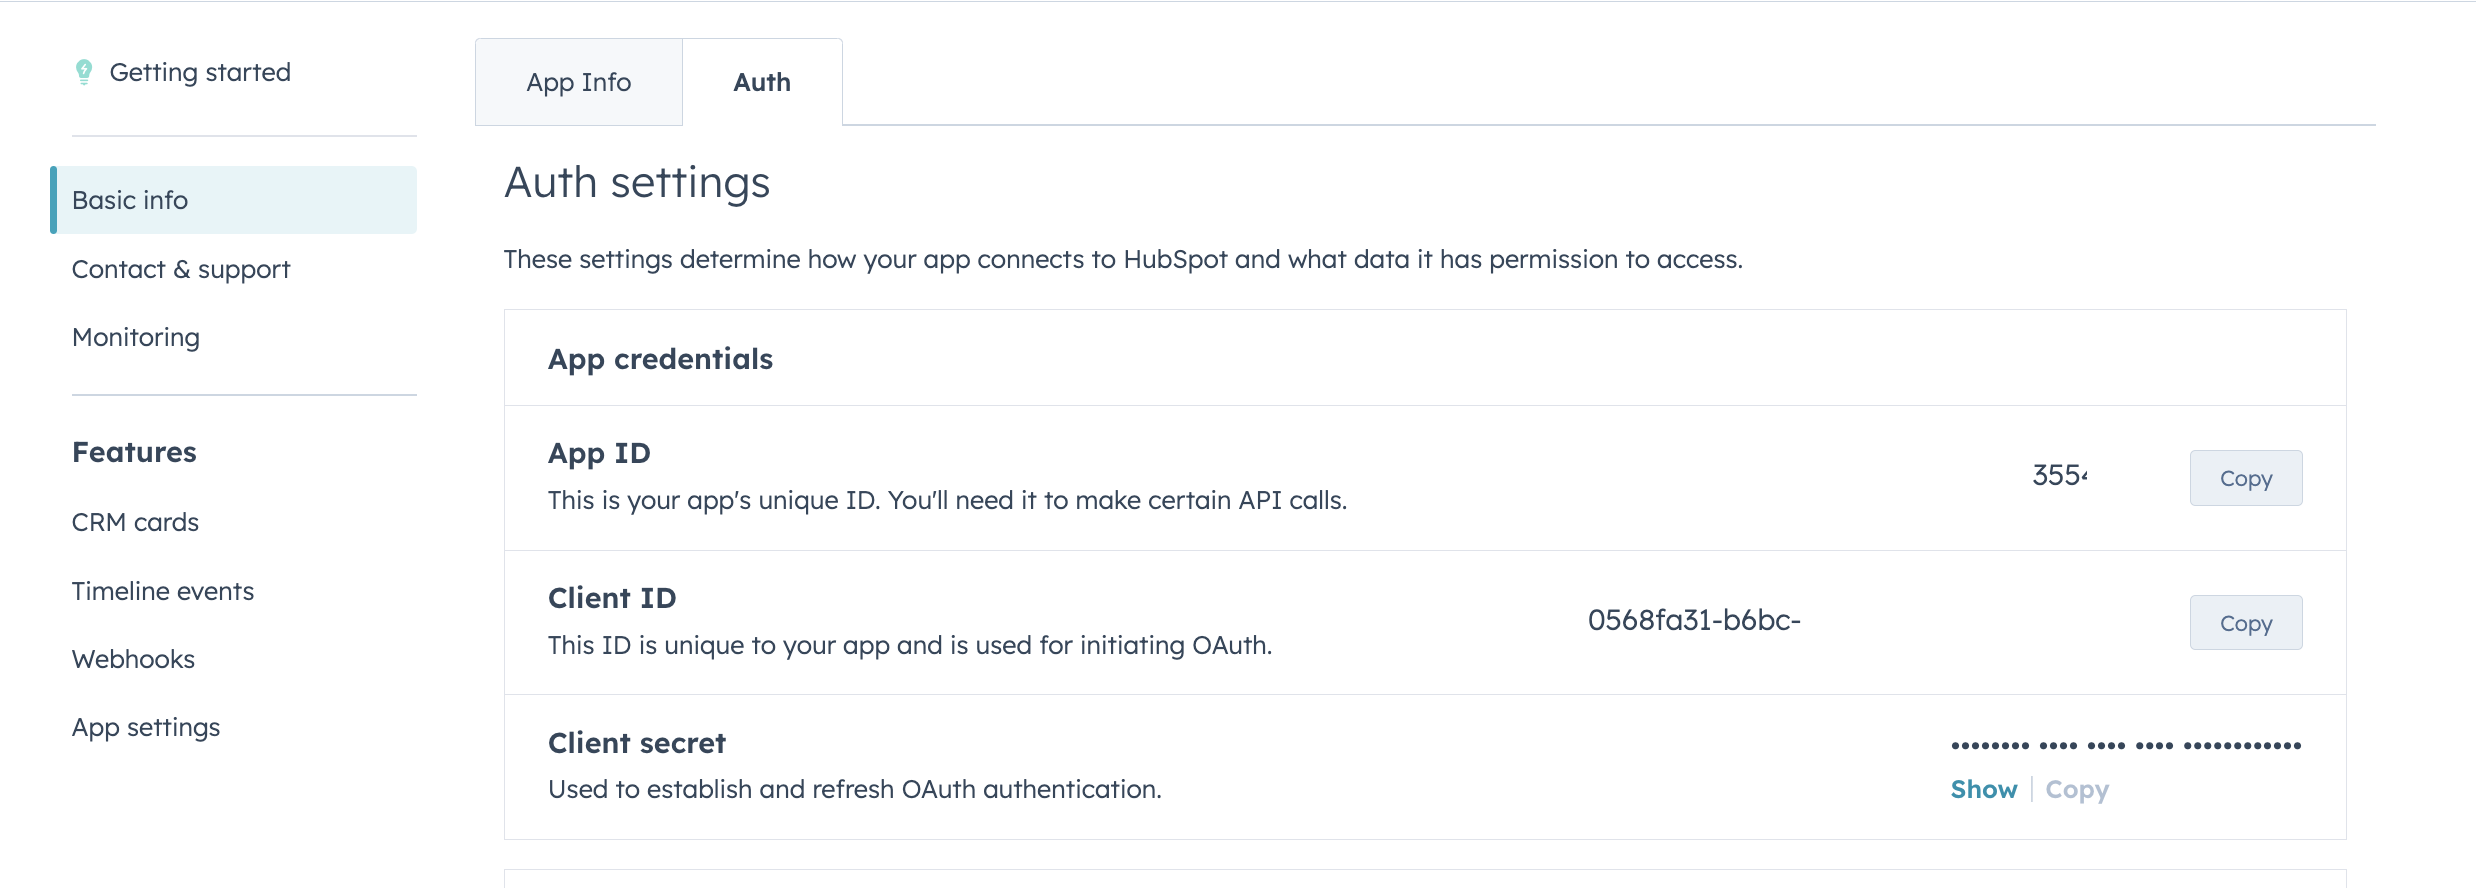
Step 4: Configuring HubSpot API
You need to get your API key from HubSpot:
- Log in to your HubSpot account.
- Navigate to Settings > Integrations > API Key.
-
If you do not have an API key, click on
Create API Key. - Copy your API key for use in the next step.
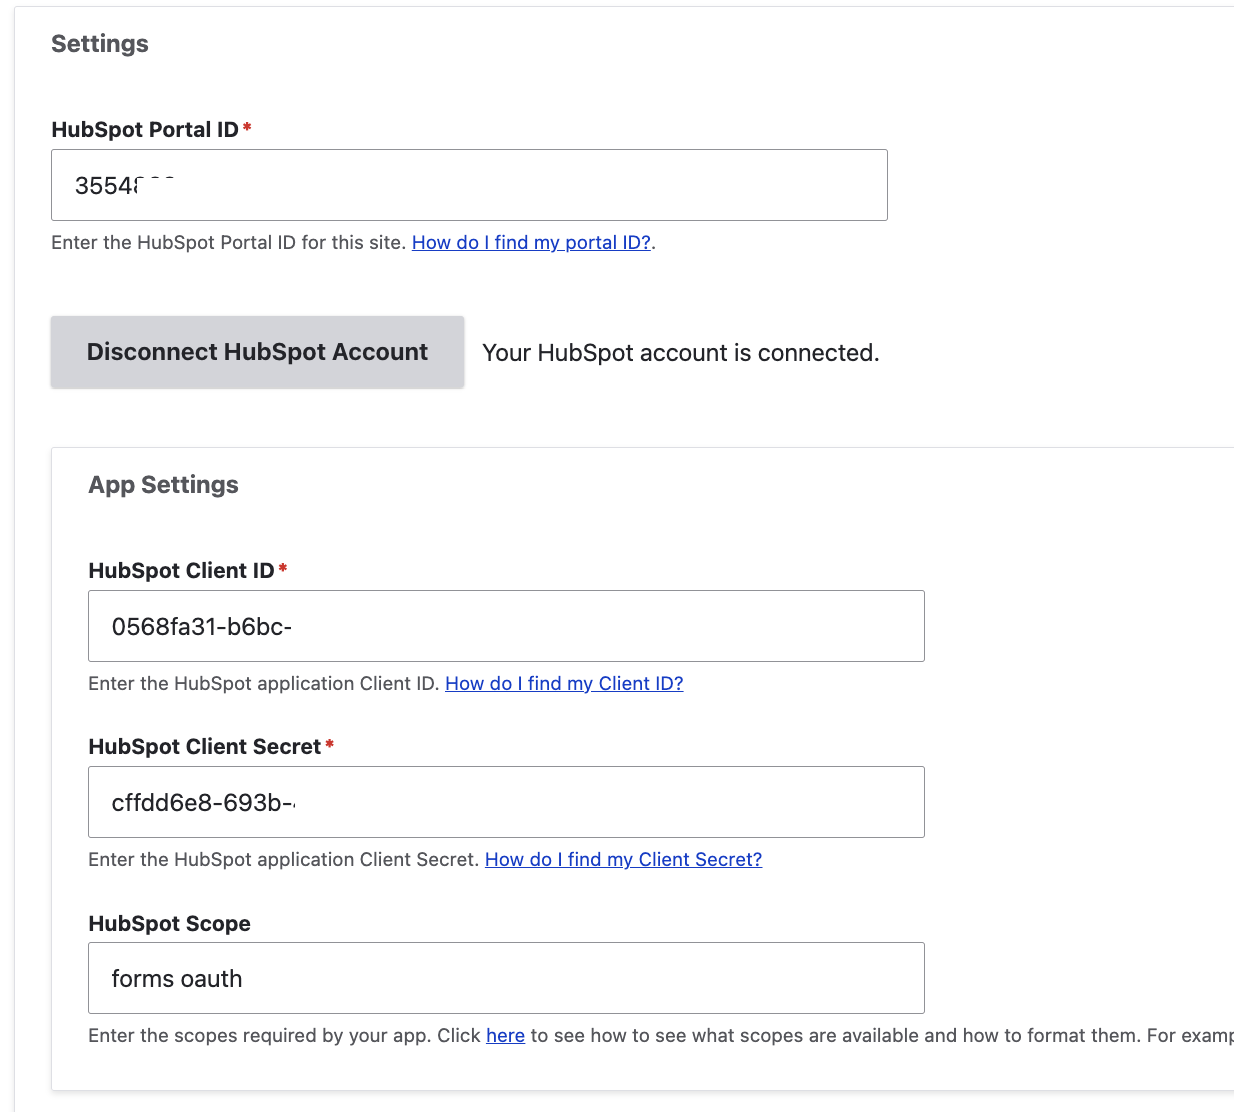
Step 5: Creating a Webform
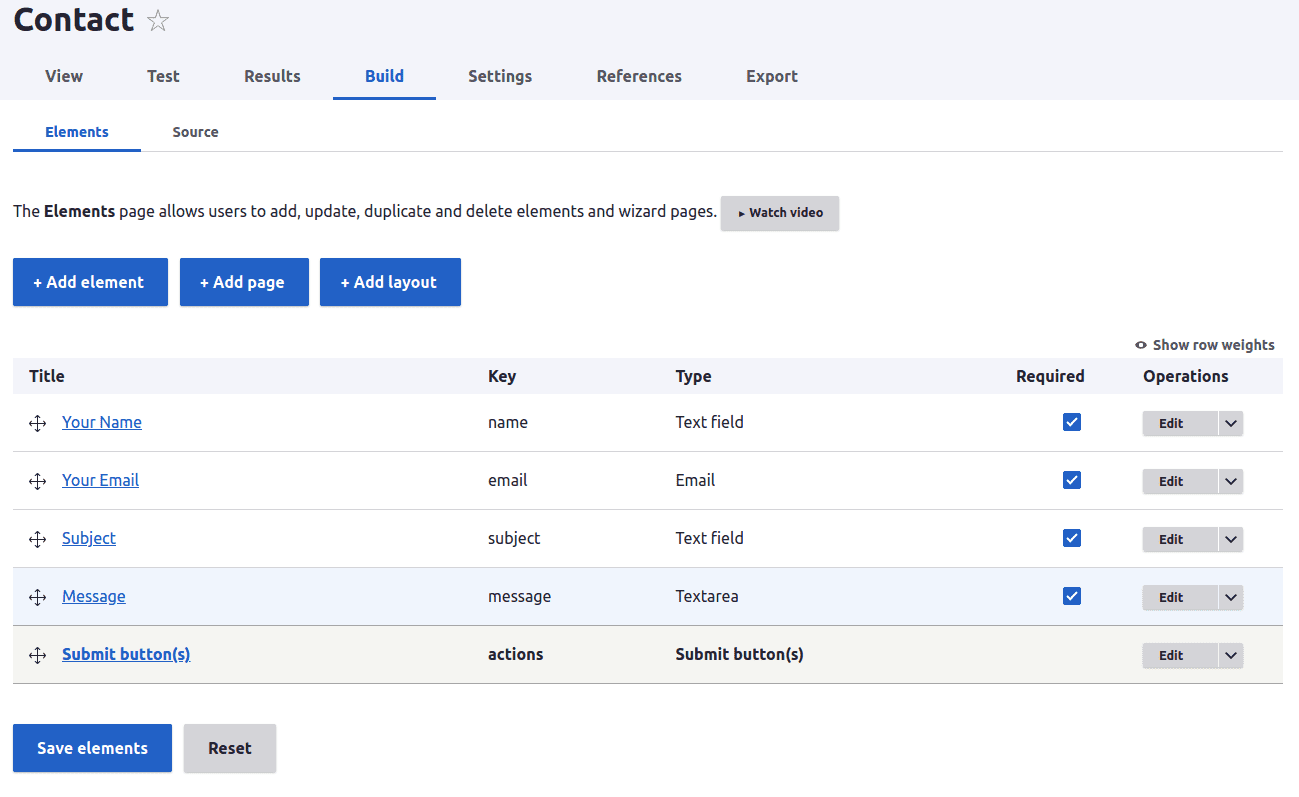
Now, create a webform that will be integrated with HubSpot:
- Go to Structure > Webforms.
- Click on Add webform.
- Fill in the details for your form and click Save.
- Add the necessary fields to your form, such as Name, Email, and Phone Number.
Step 6: Integrating Webform with HubSpot
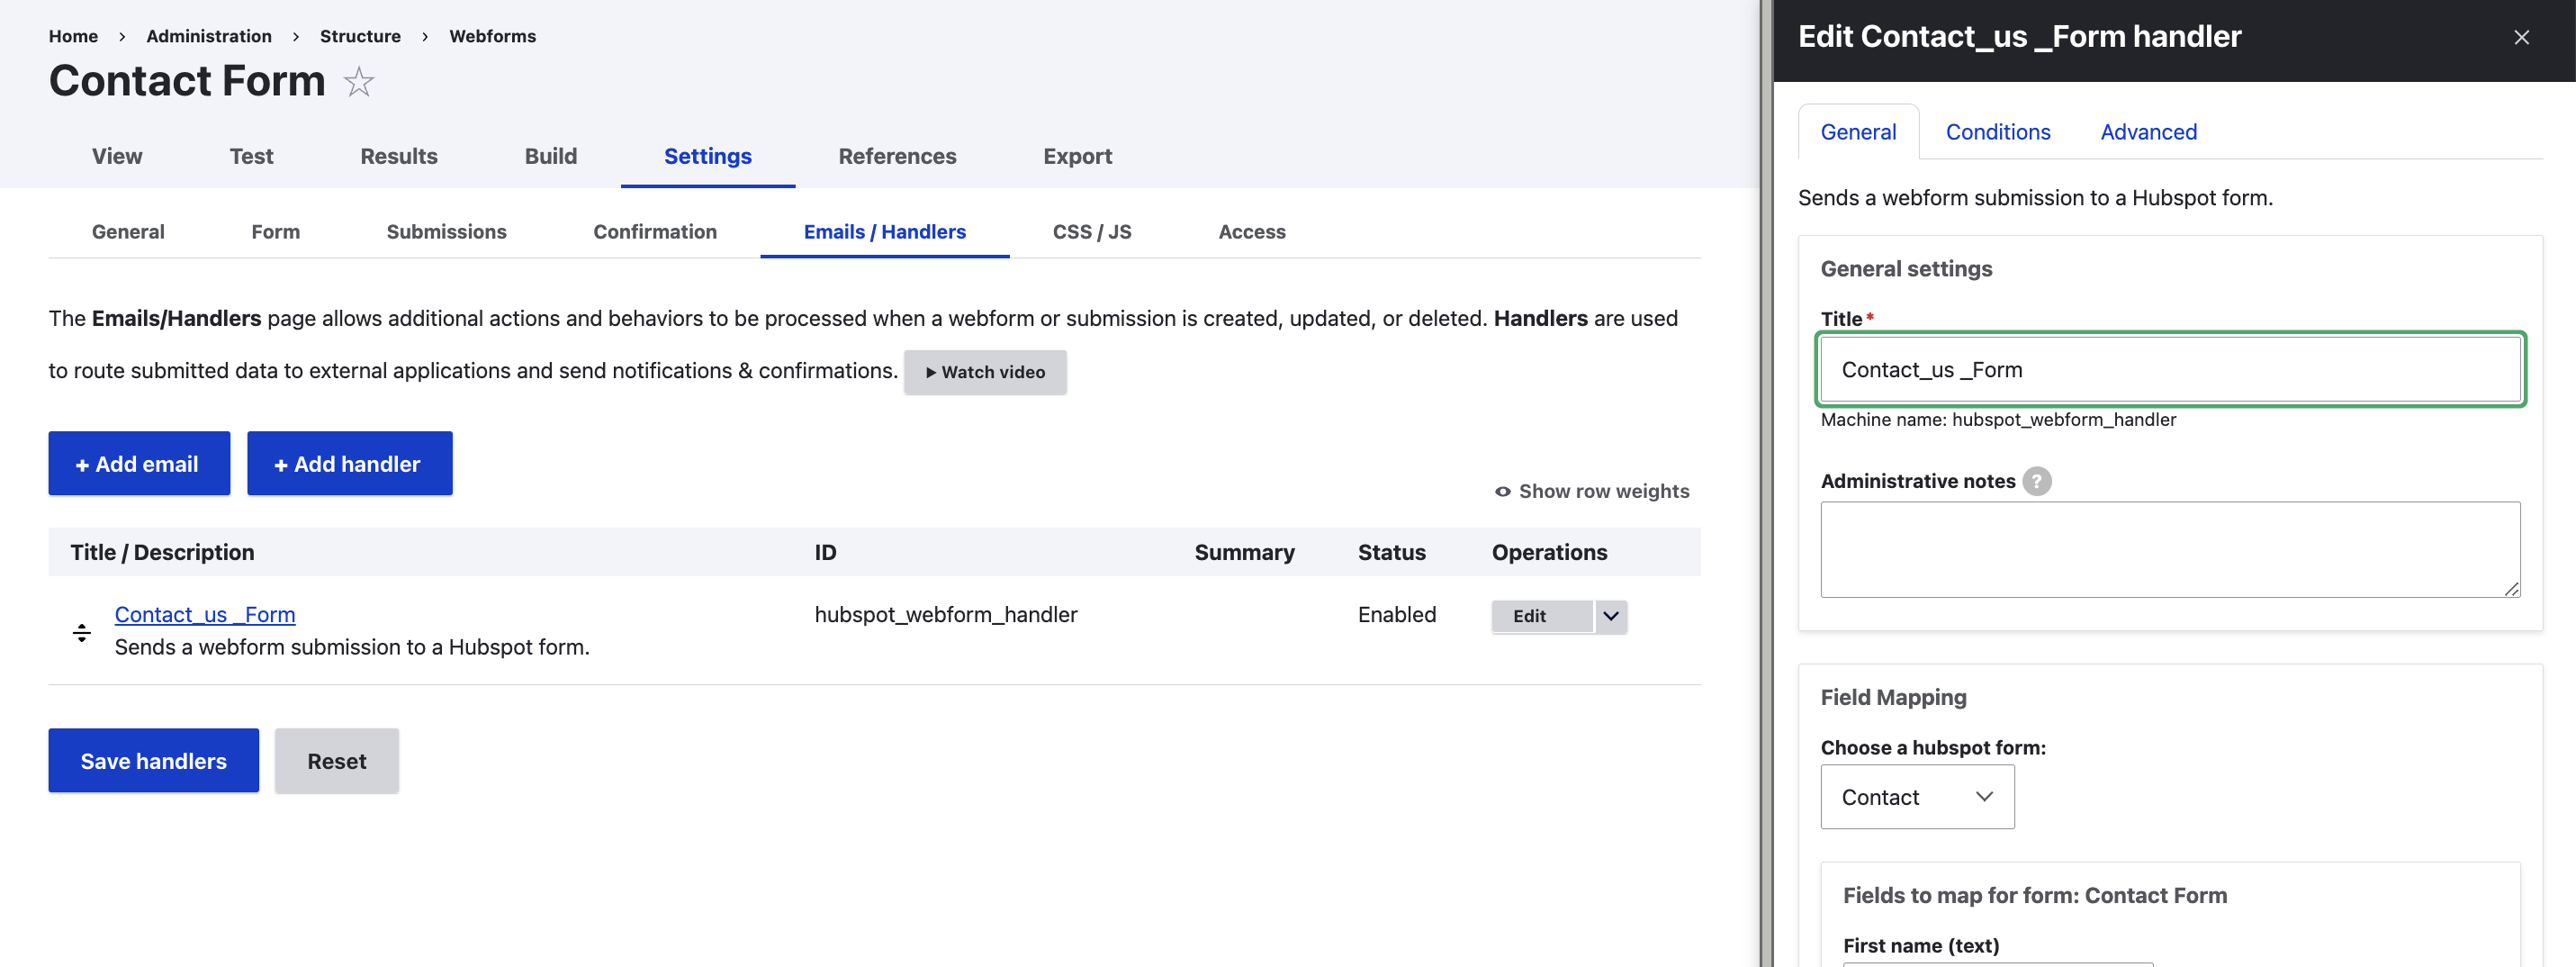
To integrate the webform with HubSpot:
- Edit your webform and go to the Settings tab.
- Select Emails / Handlers and click Add handler.
- Choose HubSpot as the handler type and configure it to map the webform fields to HubSpot properties.
- Save the handler configuration.
Step 6: Testing the Integration
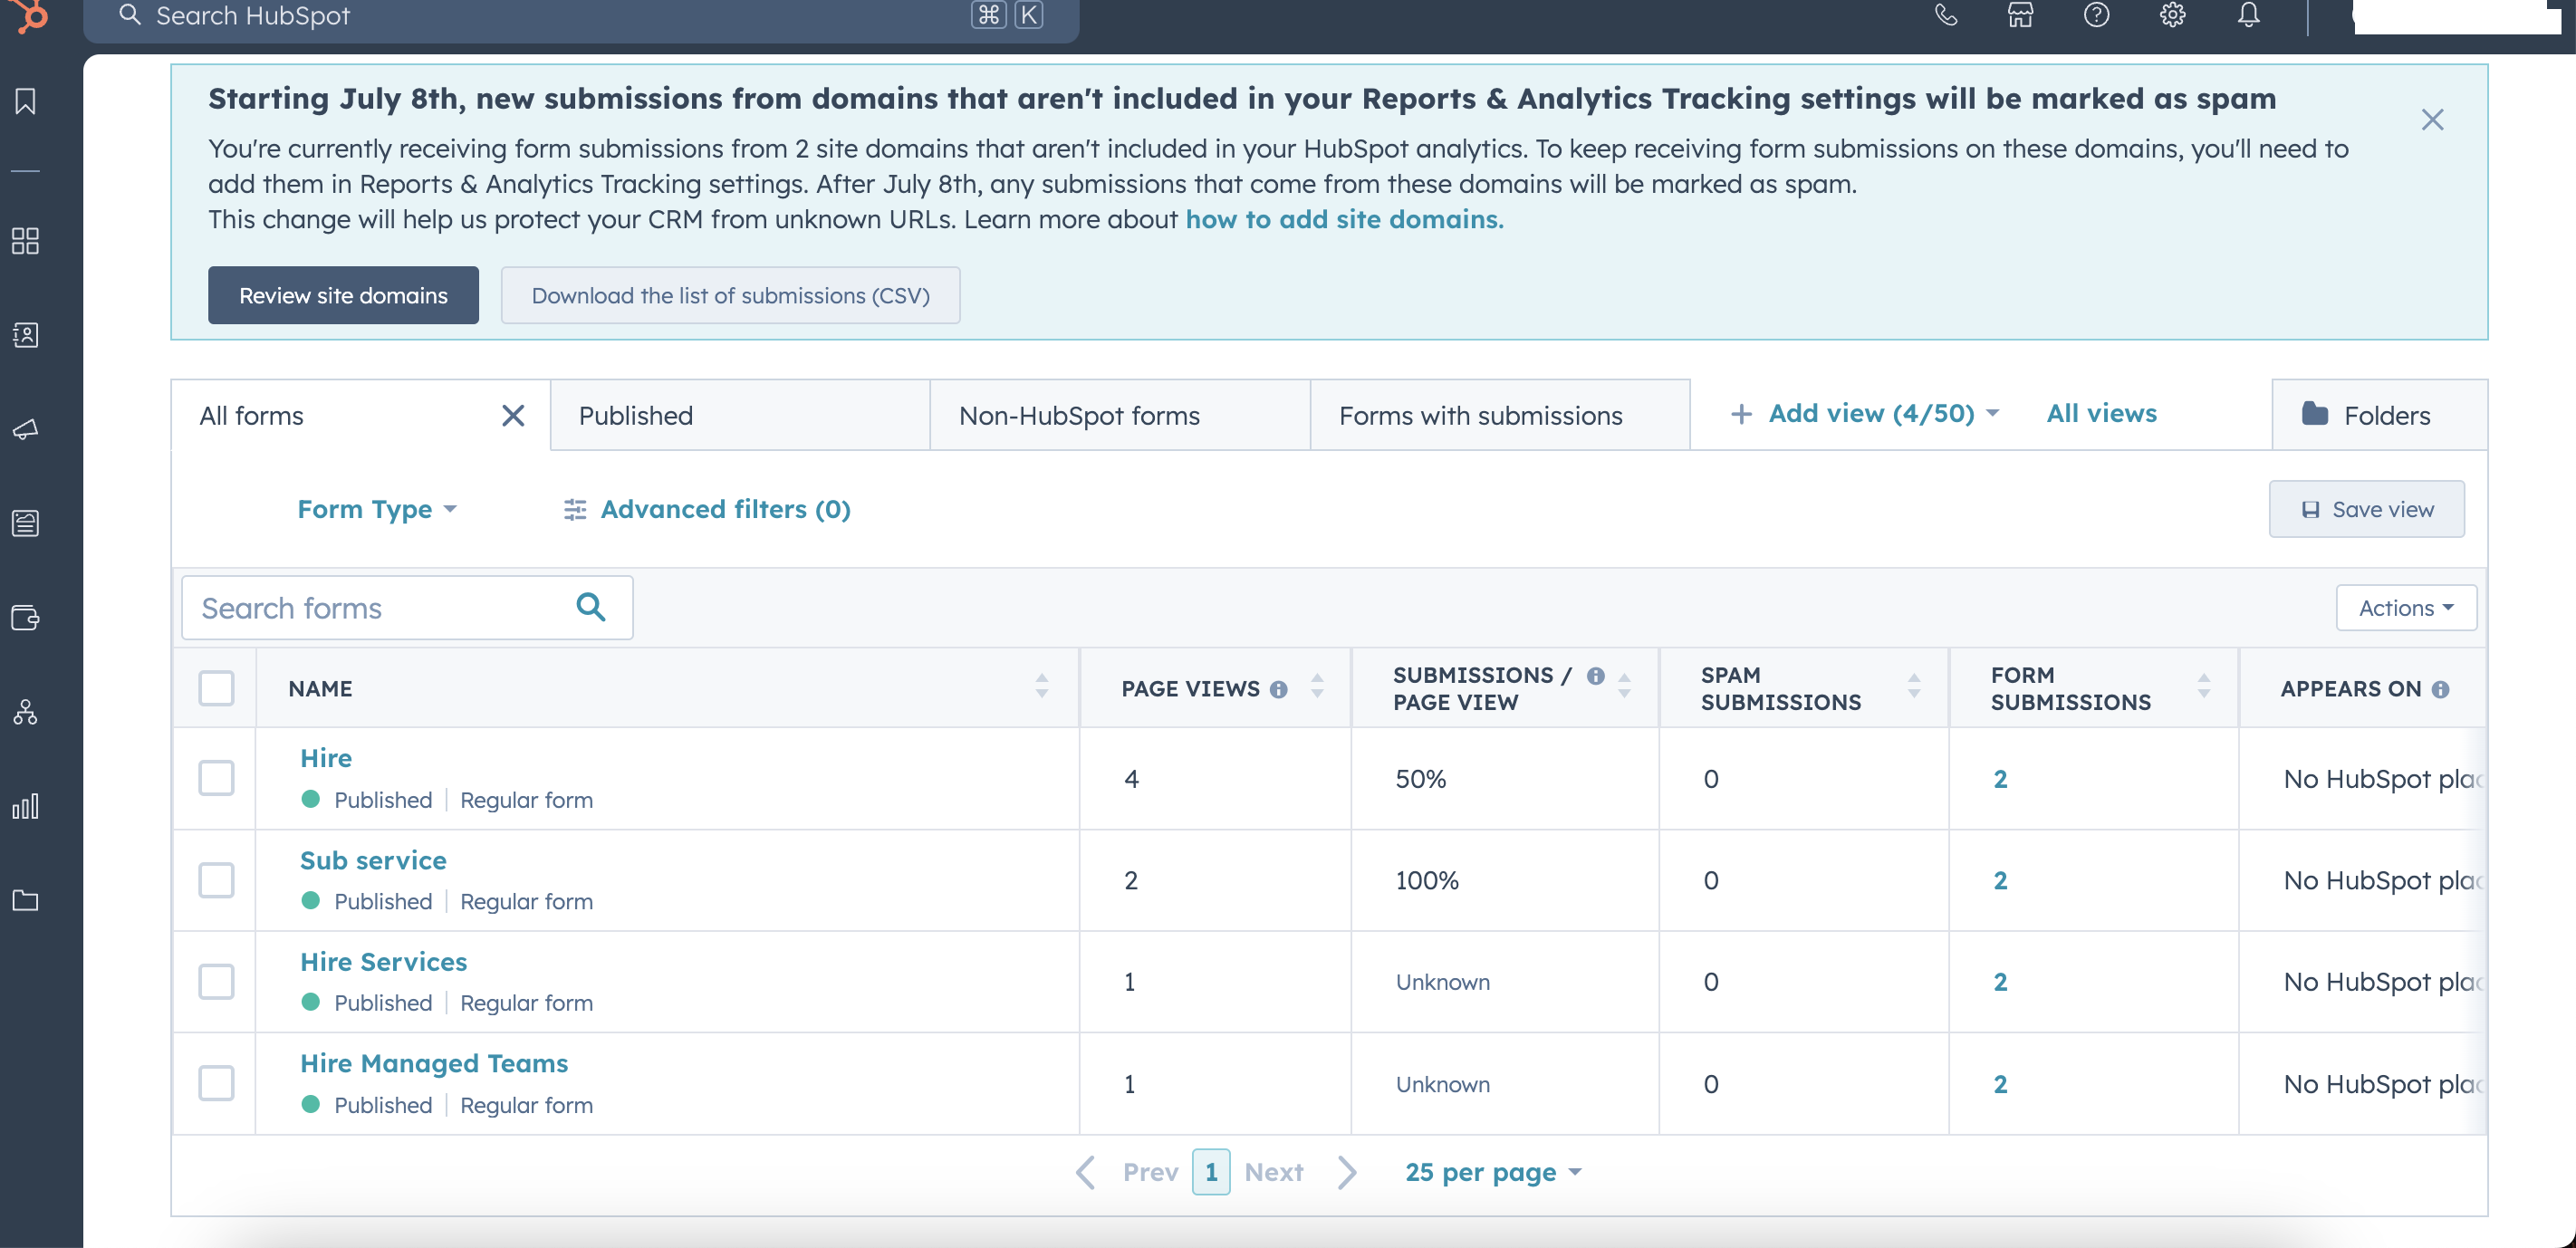
Submit the form and check your HubSpot account to ensure the form submissions are being captured correctly. If everything is set up correctly, you should see the submissions in your HubSpot contacts.
Conclusion
By following these steps, you can successfully create forms in Drupal 10 and integrate them with HubSpot. This integration helps you streamline your contact management and enhance your marketing efforts.
