Creating Custom Content Types in Drupal
Custom content types are the foundation of Drupal's content management capabilities. They enable you to structure your website's content in a way that aligns with your specific needs and requirements. This guide will walk you through the process of creating a custom content type in Drupal 10:
1. Accessing the Content Types Page:
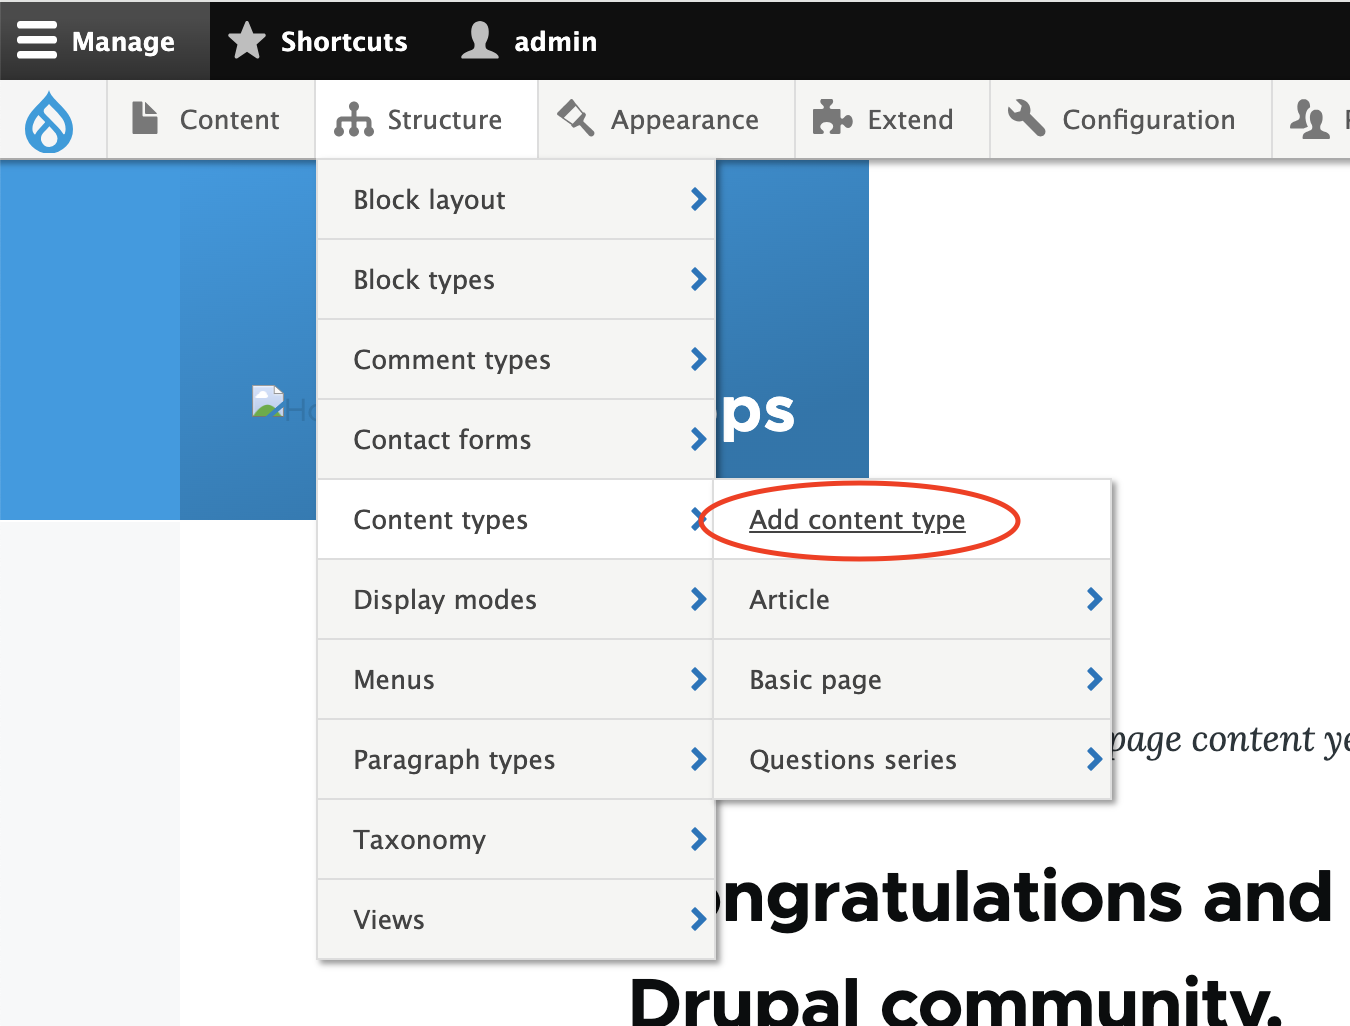
- Navigate to the "Structure" section of your Drupal administration panel.
- Click on "Content types" (admin/structure/types).
2. Adding a New Content Type:
- Click the "Add content type" button.

3. Defining the Content Type:
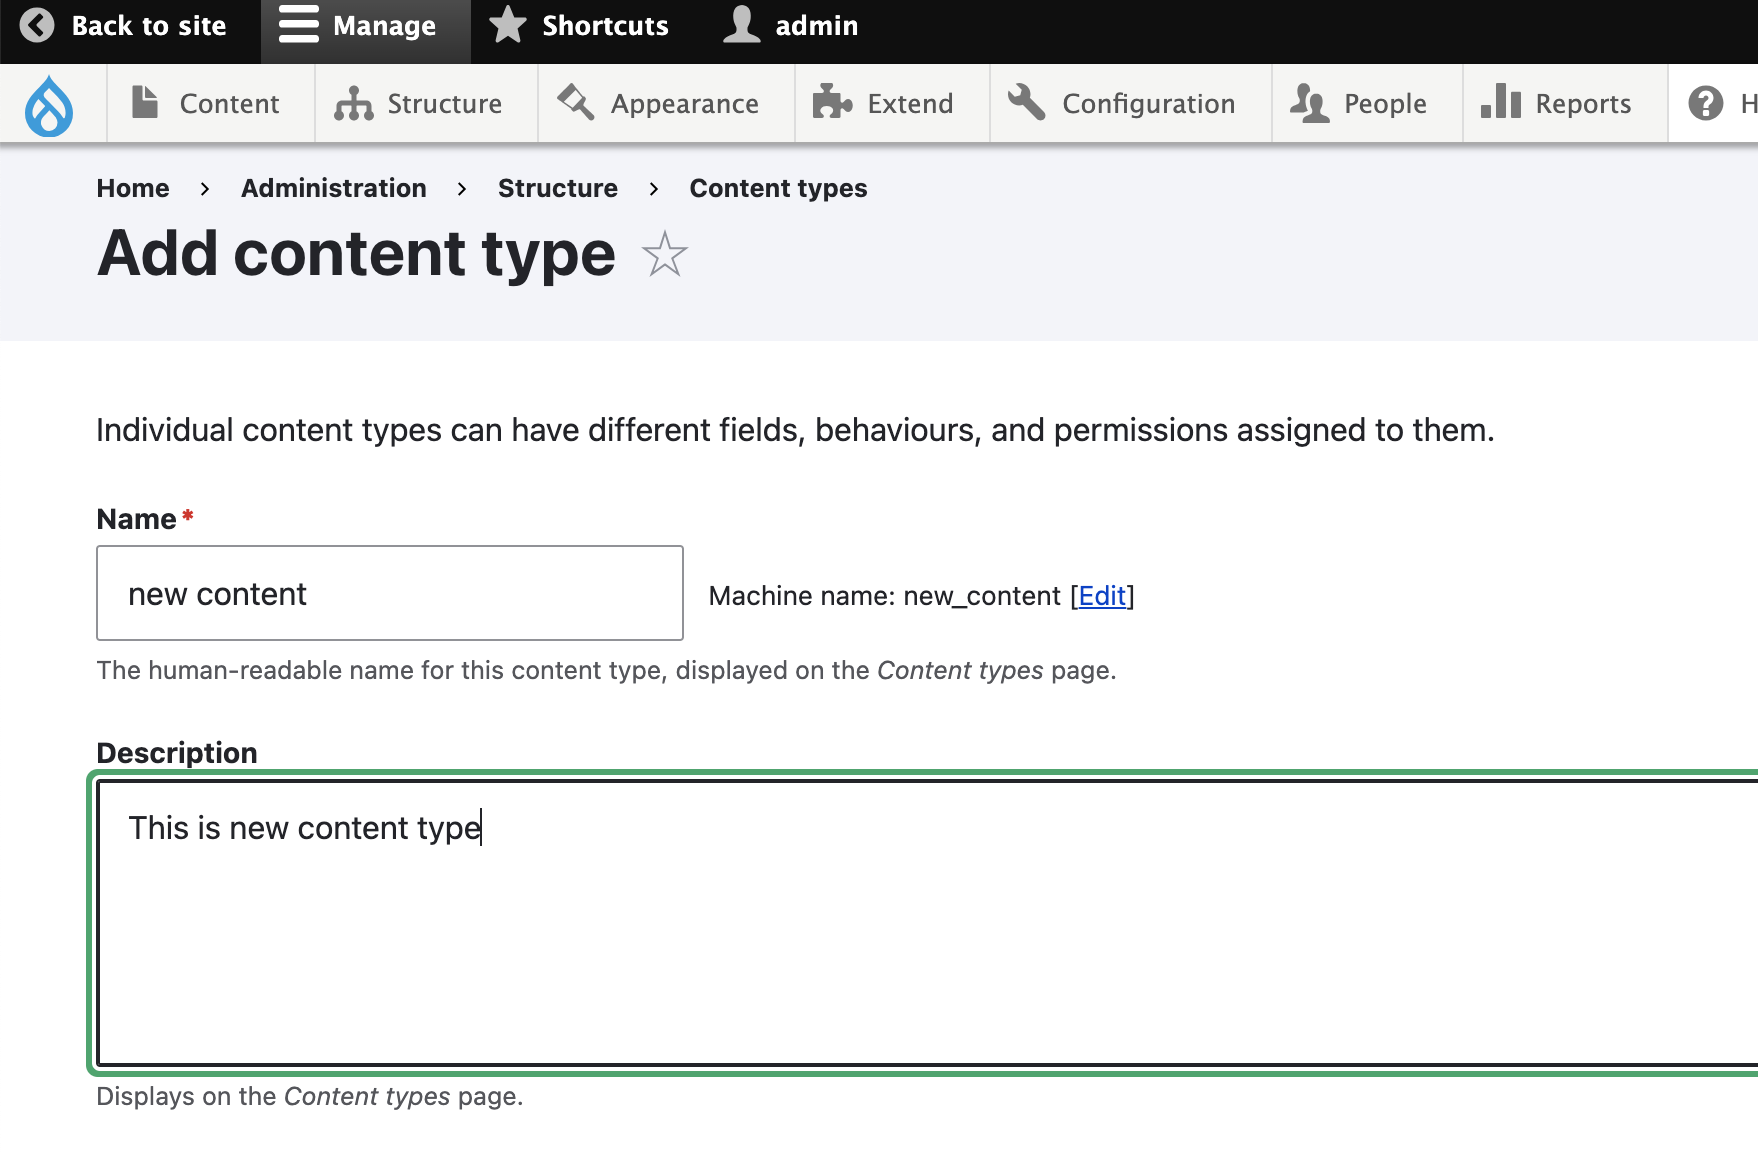
- Name: Provide a clear and descriptive name for your content type (e.g., "Article," "Event," "Product").
- Machine name: Enter a unique machine-readable name (e.g., "article," "event," "product"). This will be used in URLs and code.
- Description (optional): Add a brief explanation of the content type's purpose.

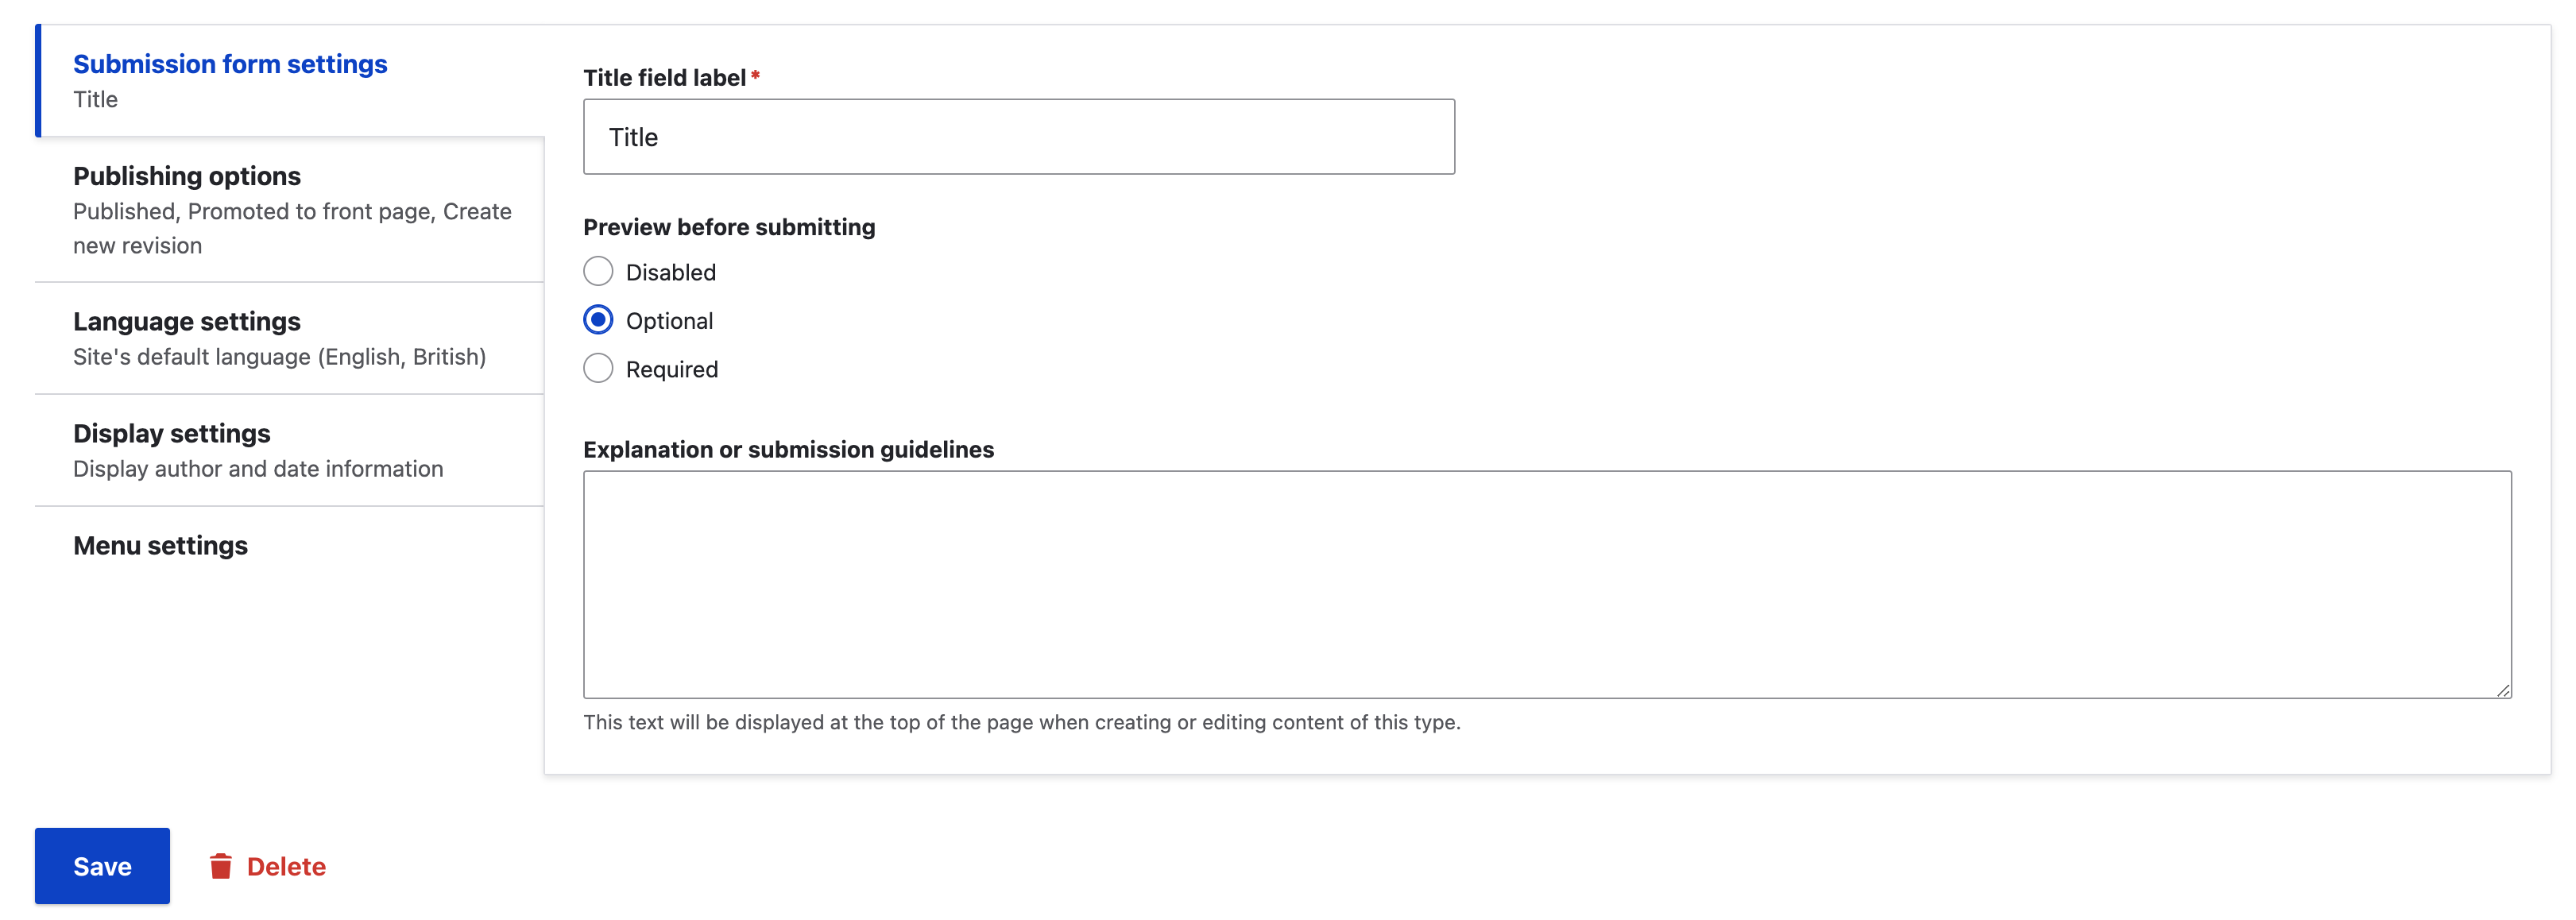
4. Configuring Submission Form Settings:
- Fields: Select the fields you want to include in the content type's creation and editing forms. You can choose from existing fields or create new ones.
- Group fields: Organize fields into logical groups for better user experience.
- Required fields: Specify which fields are mandatory for content creation.

5. Setting Publishing Options:
- Revisioning: Decide whether content revisions should be enabled, allowing users to revert to previous versions.
- Promotion: Determine if content can be promoted to the front page or other featured areas.
- Moderation: Set up moderation workflows if content requires review before publication.

6. Defining Display Settings:
- Default view mode: Choose how content will be displayed by default (e.g., full view, summary).
- Teaser view mode: Select how content will be displayed in teasers, lists, or search results.
- Custom view modes: Create additional view modes for specific display requirements.

7. Configuring Comment Settings:
- Allow comments: Enable or disable comments for this content type.
- Moderation: Set up comment moderation if needed.
8. Specifying Menu Settings:
- Menu link: Create a menu link for the content type's listing page.
- Parent menu: Choose the parent menu where the link will be placed.

9. Saving and Managing Fields:
- Click "Save and manage fields."
- This will take you to the field management page where you can add, edit, or remove fields as needed.
Additional Considerations:
- Field Types: Drupal 10 offers a wide range of field types to accommodate various content requirements (e.g., text, image, reference, date, entity reference).
- Field Groups: Grouping fields into logical sections enhances the user experience and content organization.
- Revisioning: Enabling revisions allows users to track changes and revert to previous versions if necessary.
- Moderation: Moderation workflows ensure content quality by requiring review before publication.
- Views: Create custom views to display content in different ways throughout your site.

By following these steps and considering the additional factors, you can effectively create custom content types in Drupal 10 that cater to your website's unique content structure and presentation needs.